I’m trying to add Google Drive to my Mac’s Finder sidebar for easier access, but I can’t seem to figure out how. Could someone guide me on the steps to do this? It would save me a lot of time navigating around.
If you’re rocking Google Drive for Desktop on your Mac and are looking to integrate it more smoothly into your workflow, here’s the good news: it’s a breeze to add it to Finder’s sidebar for easy access. Let me walk you through this, step by step.
Step 1: Locate Google Drive in Finder
- Fire up a Finder window.
- Look at the left-hand navigation bar. Scroll down until you reach sections labeled “Locations” or “Devices.”
- Keep an eye out for Google Drive—it’ll be listed there.
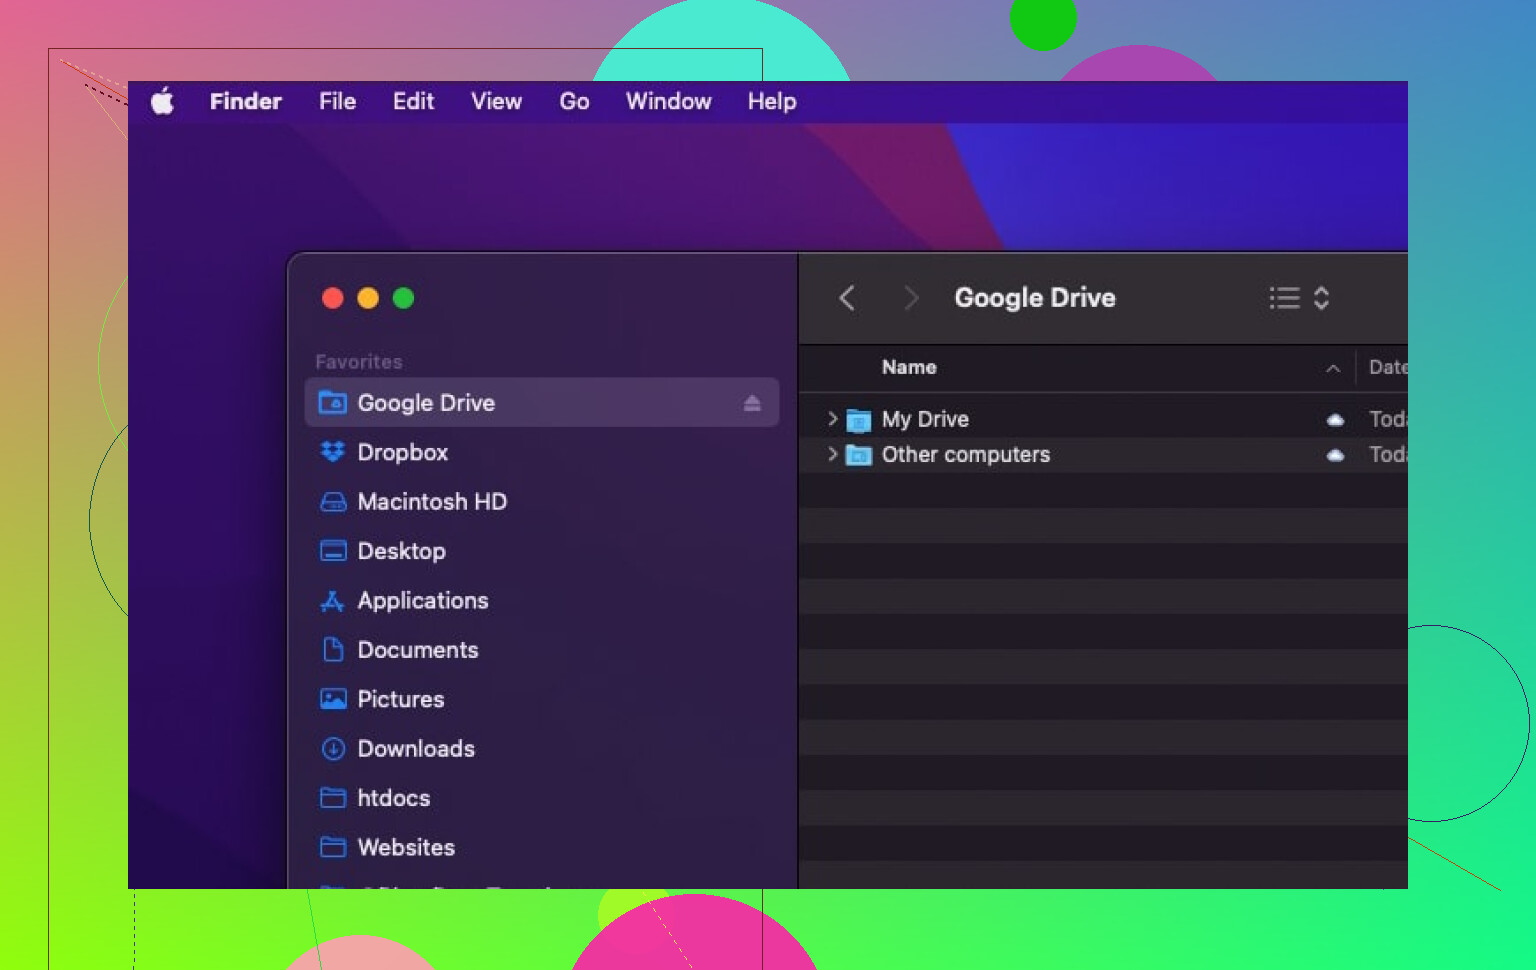
Step 2: Add Google Drive to Favorites
- Once you’ve spotted Google Drive in the sidebar under “Locations” or “Devices,” click and drag that Google Drive icon up into the “Favorites” section.
- Yep, it’s as simple as a drag-and-drop move. Now it’ll always be at your fingertips whenever you open Finder.
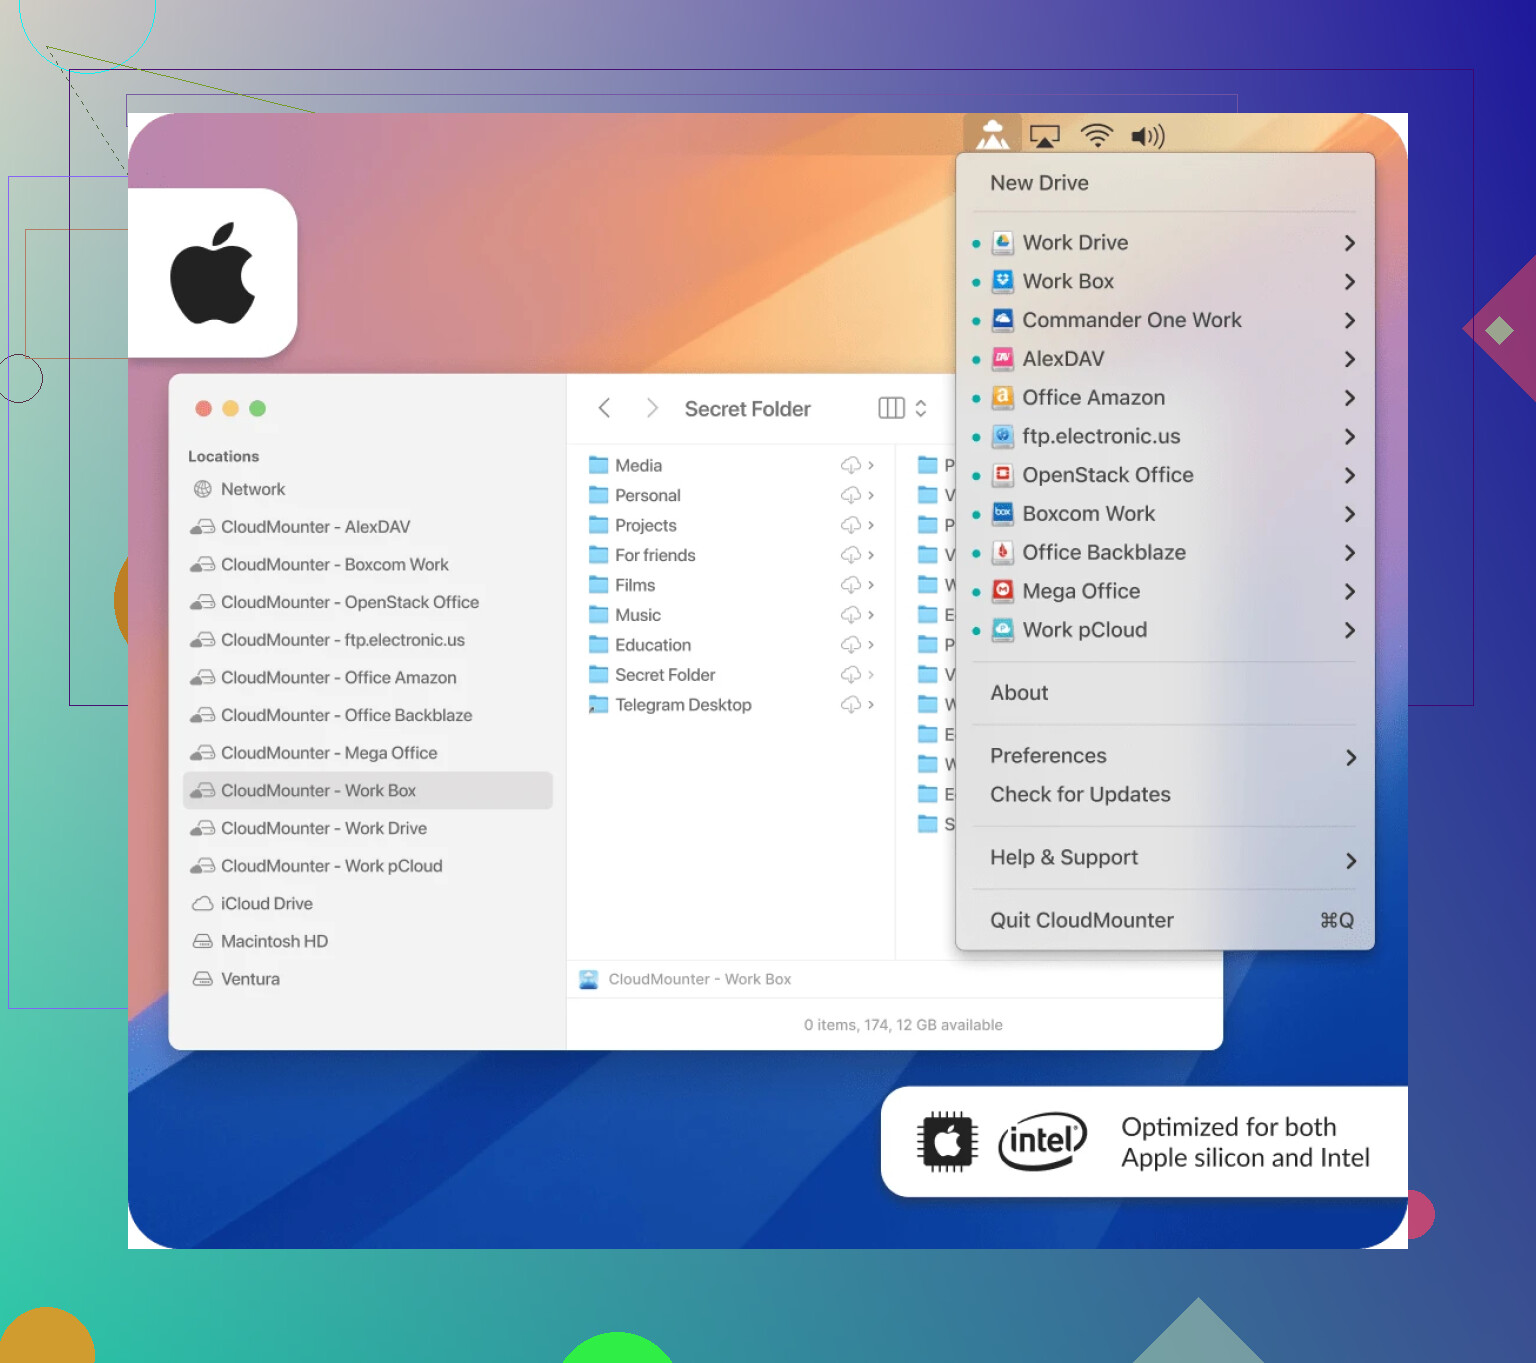
But wait—here’s where things get even cooler. If Finder-only integration feels a bit limited, there’s an app you’ll want to know about: CloudMounter. It’s a tool designed to make your cloud storage work for you like it’s part of your native system.
Why CloudMounter is Worth to Consider
- CloudMounter takes every connected cloud service—including Google Drive—and makes it accessible as a local disk. Imagine handling all your cloud files directly from Finder without syncing them to your hard drive.
- Bonus feature? Your primary Google Drive account is fully manageable at no cost!
You can manage your online files effortlessly, as though they were stored locally. Picture this scenario:
- Edit: Modify documents without ever needing to open a browser.
- Organize: Delete, move, or copy files within Finder itself.
- Create: Build new folders or files directly in your Google Drive.
- Save Space: No need to actually download files onto your hard drive—work directly in the cloud.
Ready to give CloudMounter a try? Let me know how it transforms your workflow! Share your experiences, tips, or thoughts—would love to hear how it works out for you. ![]()
So, you’re on a mission to add Google Drive to your Finder sidebar? Let me throw a few ideas your way—some conventional, some… let’s say a bit outside the box.
First off, sure, dragging and dropping Google Drive under “Favorites” as @mikeappsreviewer mentioned is straightforward, but let’s also talk alternatives because Apple sometimes has a mind of its own. If that doesn’t work (because Finder can be finicky), try this:
Manual Path Method
- Open Finder and press Cmd + Shift + G.
- In the “Go to the Folder” box, type
~/Library/CloudStorage/GoogleDrive. - Hit Return and boom—you’re in your Google Drive folder!
- Once there, right-click the folder or drag it into the sidebar. If it doesn’t stick, Finder might need a restart. Pro tip: Restarting Finder is just Option + Right-Click the Finder icon and hit “Relaunch.” Pretty satisfying.
Seemingly Obvious but Often Overlooked
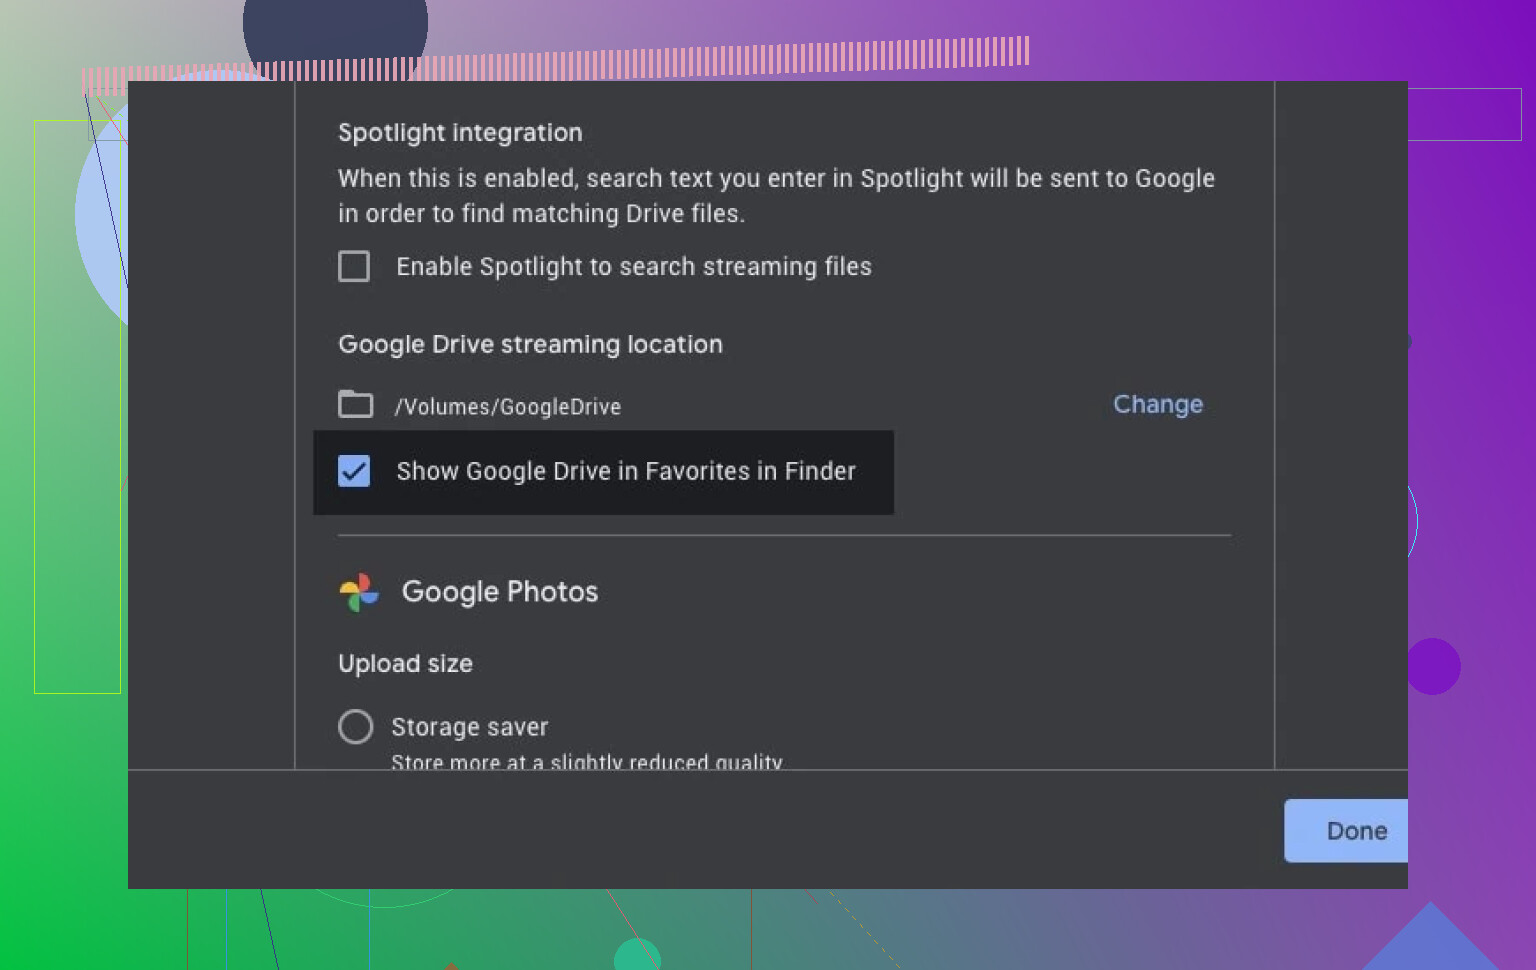
Did you download the Google Drive for Desktop app? Without it, your Drive won’t sync with your Mac correctly. Sometimes the sidebar placement fails because the app isn’t configured. Launch that bad boy, log in, and ensure syncing is enabled.
For the Overachievers or Frustrated Souls
If Finder feels like it constantly plays hard-to-get, maybe ditch Finder altogether for Google Drive management. Have you looked into a versatile tool like CloudMounter? It doesn’t just do Google Drive but makes all your cloud services show up like regular ol’ local drives. No syncing clutter, just seamless access. And yes, no browser tabs hogging all your RAM. Plus, who doesn’t like to streamline their life?
To wrap it up—assuming Finder cooperation or even CloudMounter isn’t your cup of tea—ask yourself: Do you really need the sidebar shortcut? I mean, Cmd + Space to bring up Spotlight and just typing ‘Google Drive’ might be quicker than ANY sidebar tinkering. Just saying.
Oh man, Finder’s sidebar—sometimes it feels like Apple designed it as a puzzle just to mess with us. Anyway, you’ve already got great advice from @mikeappsreviewer and @cazadordeestrellas (good stuff!), but let me throw my two cents in without rehashing their steps.
Here’s an alternative angle if dragging and dropping isn’t working: Symbolic Links. Sounds fancy, huh? But it’s basically like creating a magical portal to your Google Drive folder. Here’s how:
Step 1: Use Terminal
Before rolling your eyes, trust me, this is worth it. Open Terminal (Cmd + Space and type Terminal). Then type:
ln -s ~/Library/CloudStorage/GoogleDrive ~/Desktop/GoogleDriveShortcut
Replace GoogleDrive with the name of your account’s folder if it’s different. This creates a shortcut on your desktop.
###Step 2: Finder Integration
Drag that shiny new shortcut into your Finder sidebar. BOOM. Now you’ve tricked Finder into showing your Drive wherever you want, without Finder playing tug-of-war.
P.S. If ALL else fails, just hit Cmd + Space, type “Google Drive,” and call it a day. In some cases, Finder customization ain’t worth the stress.
If the standard drag-and-drop into Finder’s sidebar or the symbolic link trick isn’t cutting it for you, here’s another angle that doesn’t involve wrangling with Finder’s quirks or jumping into Terminal. Consider creating a Mac alias instead—it’s quick, intuitive, and sidesteps common issues:
Easy Alias Method
- Open Finder, locate your Google Drive in Locations or Devices.
- Right-click (or Control-click) on the Google Drive folder, then select ‘Make Alias’.
- Drag this alias to your Desktop or any other folder that’s convenient.
- Lastly, drop the alias into your Finder sidebar under Favorites. Presto—easy access without Finder drama!
Pros and Cons of CloudMounter
If you’re open to using apps to make life smoother, CloudMounter really elevates this further beyond Finder’s basic integration. Here’s the quick download:
Pros:
- Bypasses local file syncing—keeps your hard drive clutter-free.
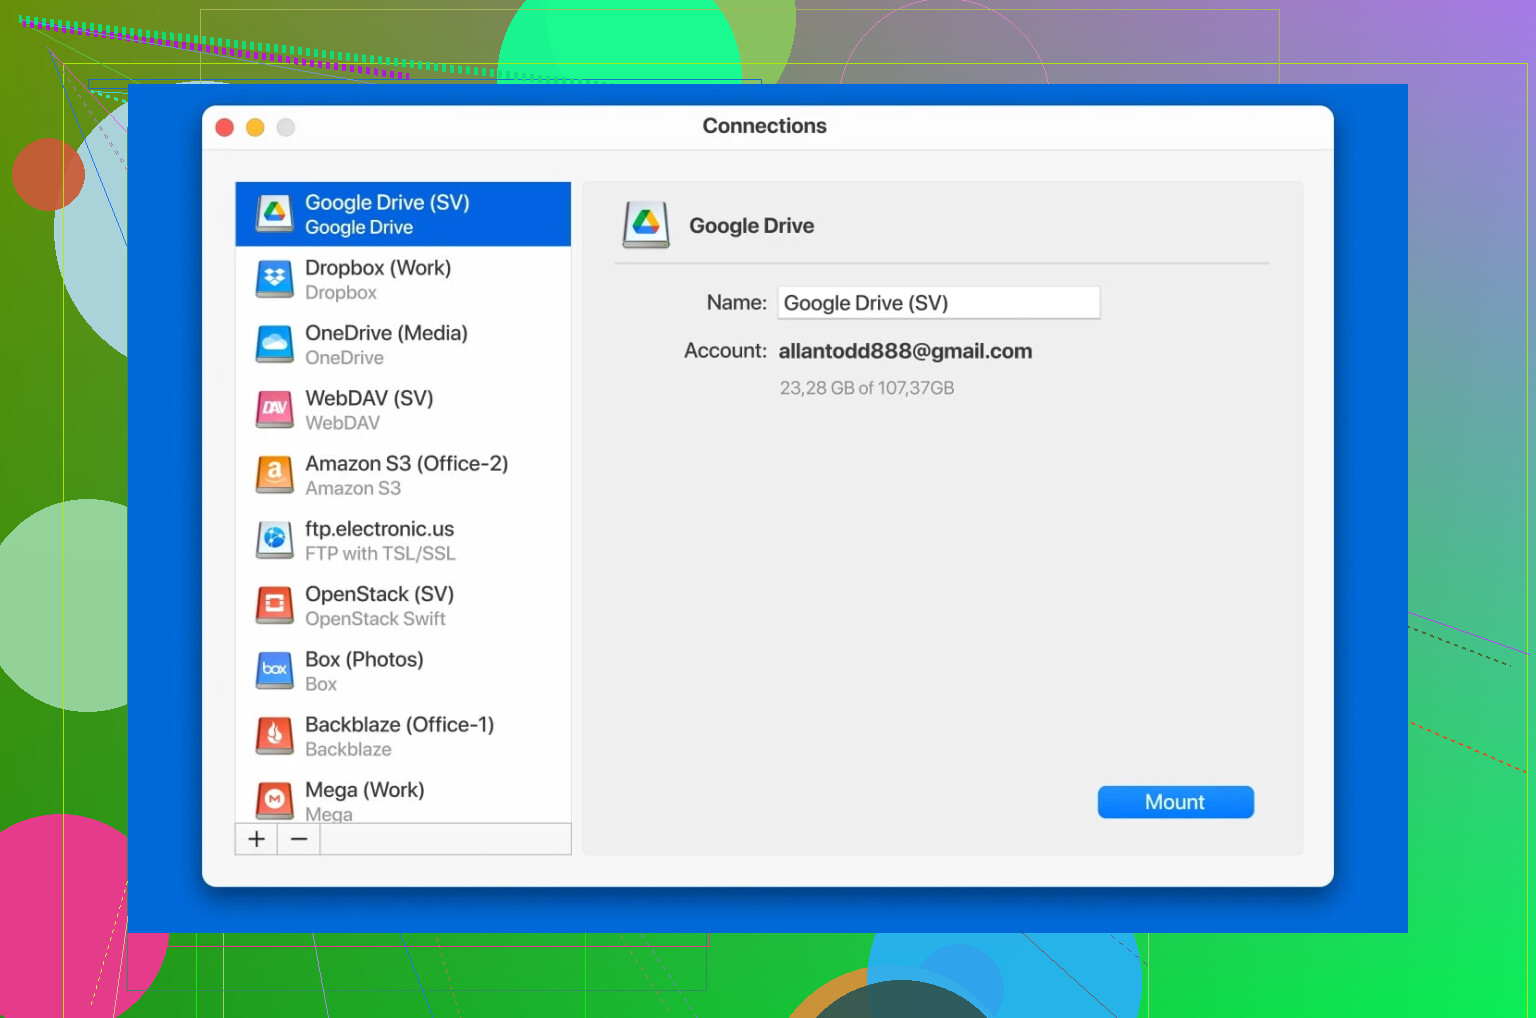
- Manage multiple clouds like Google Drive, Dropbox, and OneDrive seamlessly in one place.
- Works as if your cloud storage is a regular disk.
- Free for one Google Drive account, so no added cost unless you’re managing multiple services.
Cons:
- Not ideal for macOS purists who prefer native solutions.
- Slight learning curve for non-tech-savvy users.
- Could be overkill if all you need is a basic Finder shortcut.
Compared to other suggestions here, like symbolic links (love the ingenuity but not everyone digs Terminal commands), CloudMounter offers a polished experience, especially for pros juggling multiple cloud accounts. Other competitors, such as ExpanDrive or Mountain Duck, are also solid, but CloudMounter tends to stand out for its intuitive use and simplicity in pricing—truly a fire-and-forget solution.
Now, if none of this is clicking, just skip Finder altogether and use Spotlight (Cmd + Space) to type “Google Drive”—honestly, sometimes the quickest method is the laziest one.