I accidentally deleted important files on my Windows 11 PC and already emptied the Recycle Bin before realizing they were gone. These documents and photos are really important, and I need the best way to recover deleted files in Windows 11 as soon as possible. I’d really appreciate any safe recovery tips or software recommendations.
Hey,
I ran into this on Windows 11 a while back. A file looked gone for good, not in the Recycle Bin, gone with Shift+Delete, the whole deal. In a lot of cases, Windows does not wipe the file right away. It usually removes the reference to it, then waits until new data lands on the same space. So yes, recovery is often still possible if you move fast.
What I would check before touching recovery tools
- Recycle Bin. Sounds obvious, but I’ve seen files end up there when I swore they were permanently deleted.
- OneDrive Recycle Bin, if your Desktop, Documents, or Pictures sync there.
- File History backups.
- Previous Versions on the folder where the file lived.
- Any other backup spot, external SSD, old USB stick, another PC, Google Drive, Dropbox, whatever you use.
Big one here, stop using the drive if you can. I mean it. Don’t install apps on it. Don’t dump downloads on it. Don’t move a bunch of files around. Every write raises the odds your deleted data gets replaced. On SSDs, this gets worse because of TRIM. Once TRIM has done its thing, recovery gets ugly fast, sometiems impossible.
If the file is nowhere else
Then I’d try recovery software.
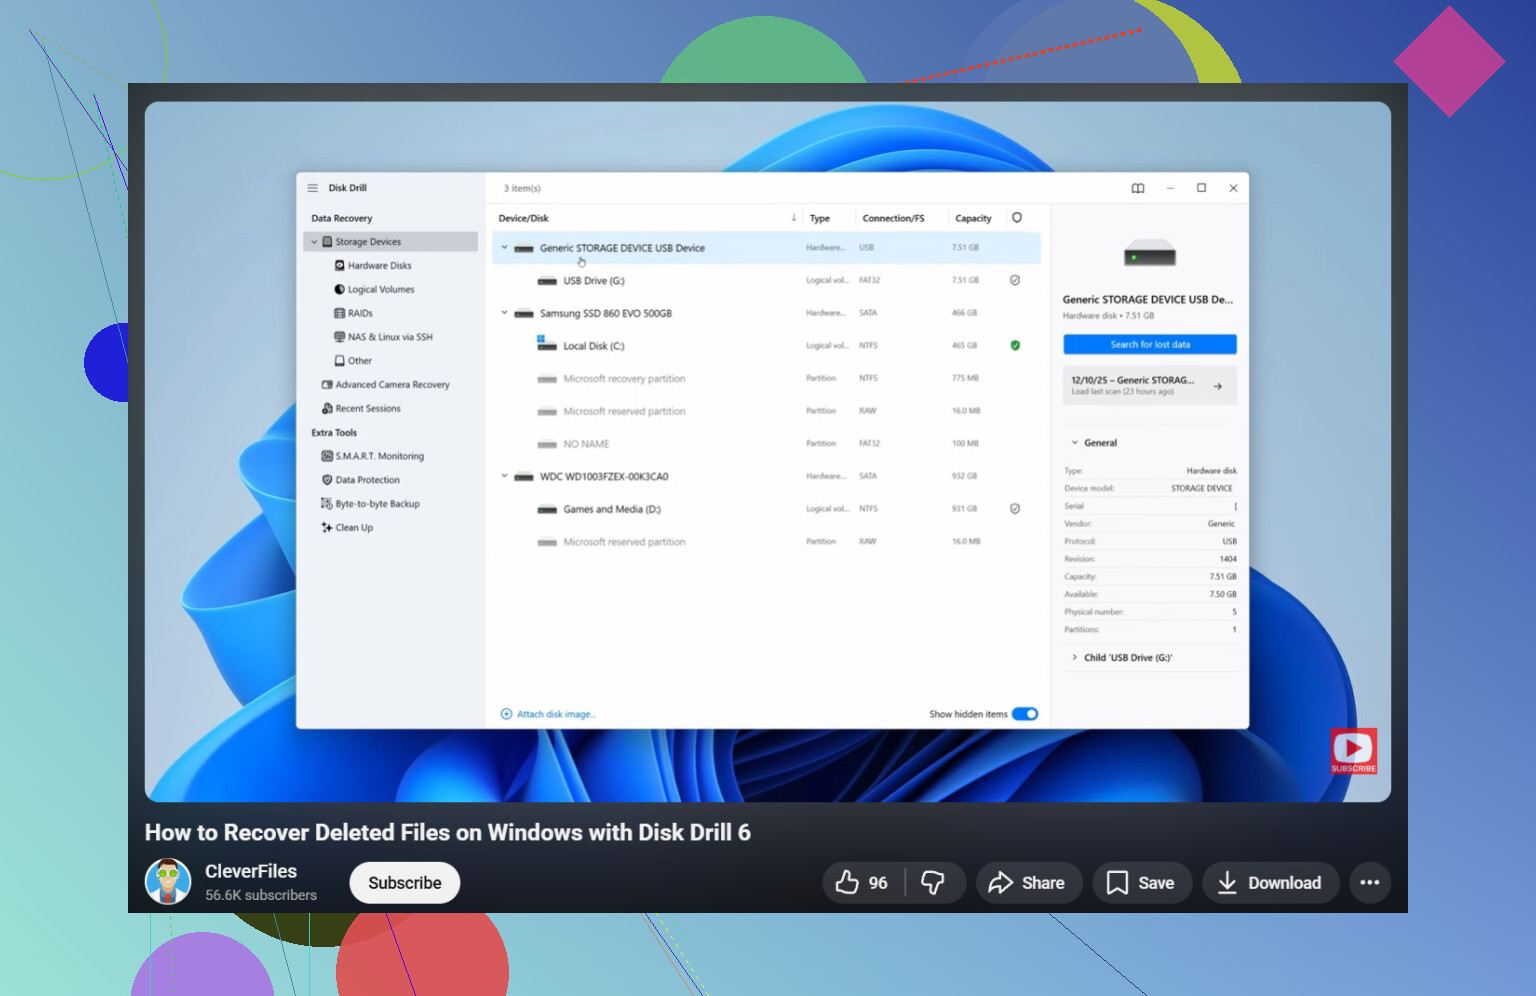
The first tool I’d reach for is Disk Drill. I used it after testing a few others, and it was the least annoying by far. Cleaner interface, fewer weird steps, and in my case it kept original filenames and folder paths on a good chunk of recovered files. That alone saved me a pile of time.
How I’d do it
- Install Disk Drill on a different drive, not the one where the file was deleted.
- Launch it and pick the affected drive.
- Hit Search for Lost Data.
- Wait. Full scans are not quick on larger drives.
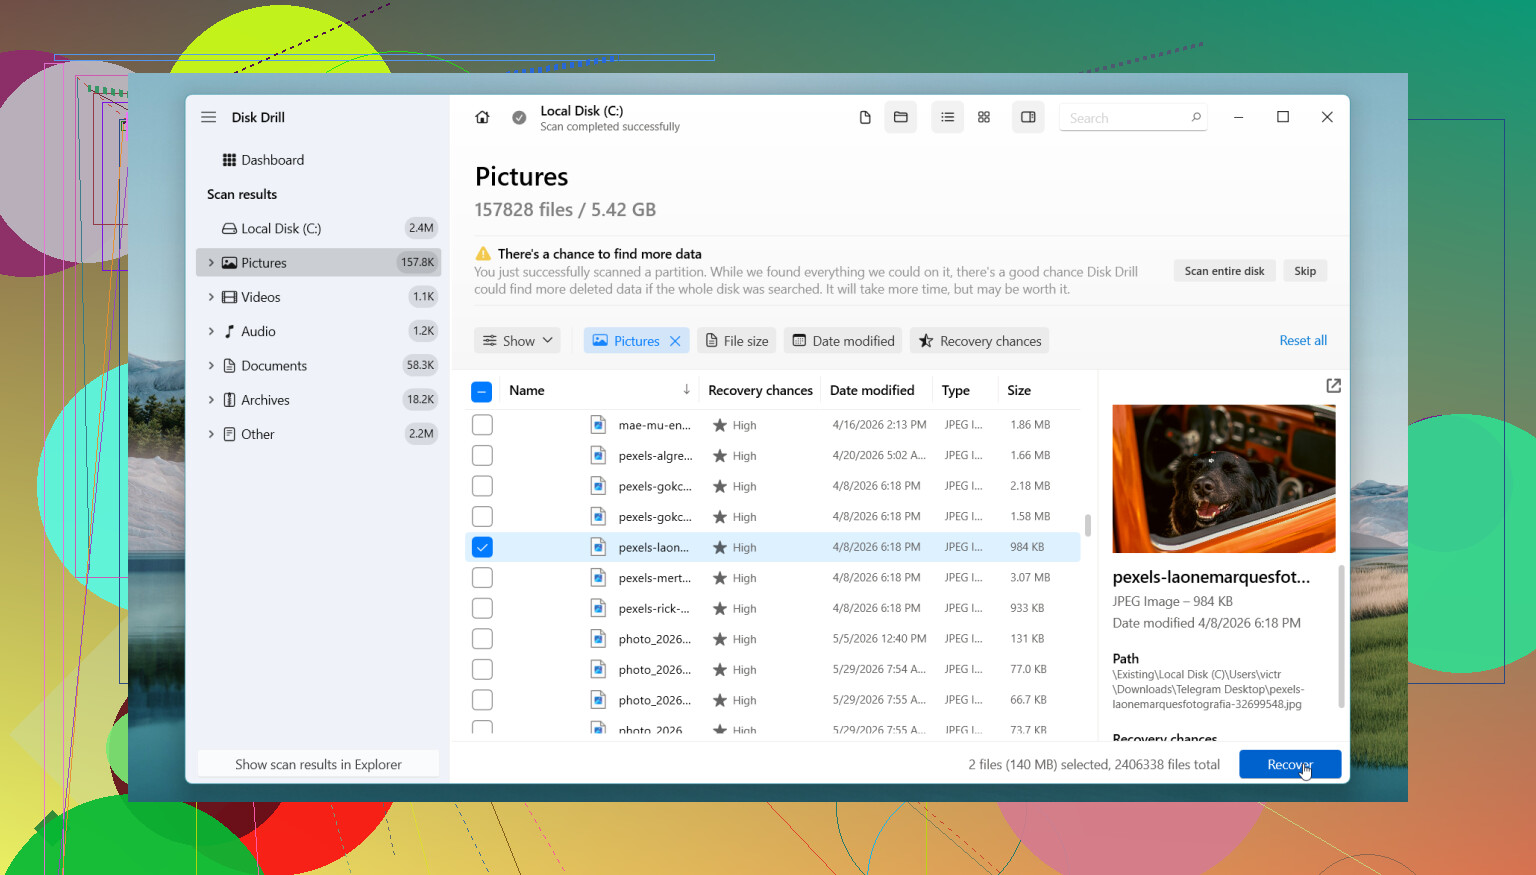
- Use search and filters to narrow results by name, type, or location.
- Preview files when preview works.
- Recover everything to another drive, never back to the same one.
The Windows free tier lets you scan and preview without limits, and it recovers up to 100 MB. For me, that’s enough to confirm whether the missing file is there before spending money.
If you want a free option
PhotoRec is the usual answer. It pulls back a lot of files, I’ll give it that. The catch is organization. You often lose original names and folder structure, so the results folder turns into a mess. Fine if you’re digging for photos or a handful of docs. Less fun if you deleted a whole project folder and need things sorted.
When I’d stop and go to a recovery shop
- The drive clicks, grinds, or makes any new noise.
- Windows stops seeing the drive.
- The drive keeps disconnecting.
- The SSD or HDD looks physically damaged.
- The data matters enough where you don’t want to gamble.
- Recovery tools come up empty.
I’ve seen people keep retrying scans and random fixes until the situation got worse. If the drive seems unhealthy, doing less is smarter.
So yeah, deleted files in Windows 11 are often recoverable, even after they leave the Recycle Bin. Check backups first. Then keep drive activity low and scan from another disk. If you’re lucky, the file is still sitting there waiting to be picked up.
First thing, stop writing to that drive. If your deleted files were on C:, shut the PC down if you have another machine available. SSDs on Windows 11 lose recoverable data fast because of TRIM. HDDs give you better odds.
I agree with @mikeappsreviewer on checking cloud and backup sources first. I disagree a bit on spending too long there if this is urgent. If the files matter, start recovery early while the blocks are still untouched.
My order would be:
-
Check Office apps.
Word, Excel, and some photo editors keep temp or autorecovery copies.
Look in:
C:\Users\YourName\AppData\Roaming\Microsoft\Word
C:\Users\YourName\AppData\Local\Microsoft\Office\UnsavedFiles -
Search Windows thumbnail and cache leftovers.
For photos, tools like NirSoft thumbnails viewers sometimes show previews even when full files are gone. Not ideal, but better than nothing if you need proof or a low-res copy. -
Use Windows File Recovery.
It’s Microsoft’s command line tool from the Store. Free. More annoying than Disk Drill, but worth a shot if you want a no-cost pass first. Example:
winfr C: D: /regular /n \Users\YourName\Documents\report.docx
Recover to a different drive only. -
Then use Disk Drill.
I’d use Disk Drill after the free Microsoft pass, not before. It tends to find more file signatures and it’s easier to sort photos and docs. For mixed file loss, it saves time. Install it on another drive or a USB, then recover to a second drive. Dont put recovered files back on the source.
If the drive is making noises, disappearing, or showing SMART errors, stop. Software recovery is the wrong move then.
For a clean walkthrough, this deleted files recovery guide for Windows 11 is easier to follow than most video fluff:
watch this Windows deleted files recovery walkthrough
One more thing, if these are family photos, legal docs, or work files with deadlines, a pro lab is cheaper than regret. I’ve seen people rescan five times and make it worse. Time matters here, alot.
Stop using that PC for anything heavy, but I’d add one thing neither @mikeappsreviewer nor @codecrafter really stressed enough: check whether the files were in a library-backed folder and got silently moved or synced somewhere weird. Windows 11 + OneDrive can do some goofy stuff with Desktop/Documents/Pictures.
Also, I would not keep running multiple recovery tools one after another on the same drive if it’s an SSD. People assume “more scans = more chances,” but sometimes you’re just burning time while TRIM does its thing.
My practical order would be:
- Search by exact filename in File Explorer and OneDrive web.
- Check Recent files in Word/Excel/Photos.
- If you had Storage Sense or backup software, inspect its logs/history.
- If nothing shows, use one recovery path, not six.
For most people, Disk Drill is the easiest place to start because the preview and file-type sorting are way less painful than the free tools. I disagree a bit with doing Microsoft’s command line tool first unless you’re comfortable with it, becuase in urgent cases fumbling syntax wastes time. Recover to a different drive only.
If the drive is failing, stop DIY immediately.
Also, this is a solid thread on how to recover permanently deleted files on Windows 11 that covers extra recovery angles.
One angle I’d add to what @codecrafter, @cacadordeestrelas, and @mikeappsreviewer said: check Windows Search index leftovers and app-specific local caches before doing anything fancy. I’ve recovered “deleted” PDFs and images that were actually still sitting in app cache folders, especially from Adobe, WhatsApp Desktop, Teams, and browser downloads.
A small disagreement: I would not spend too long on thumbnail recovery unless you only need proof the photo existed. Nice fallback, not a real recovery plan.
What I’d do right now:
- Open the app that created the file and check its recent list
- Check
Downloads, temp export folders, and browser download history - Look in
C:\Users\YourName\AppData\Local\Temp - If it was an attached file, check mail client cache
- If nothing turns up, pick one recovery tool and do one careful pass
For that, Disk Drill is the practical choice if you want speed and a usable interface.
Pros of Disk Drill
- Easy preview
- Good filtering by file type
- Better for mixed photos/docs than many free tools
- Less command-line fumbling
Cons
- Free recovery limit on Windows is small
- Deep scans can return lots of junk filenames
- Not magic on TRIMmed SSDs
If the files were on an SSD and this happened hours ago on your active system drive, chances drop fast. If they were on an HDD or external drive, odds are better. If this is business-critical data, stop DIY after one pass and call a lab.